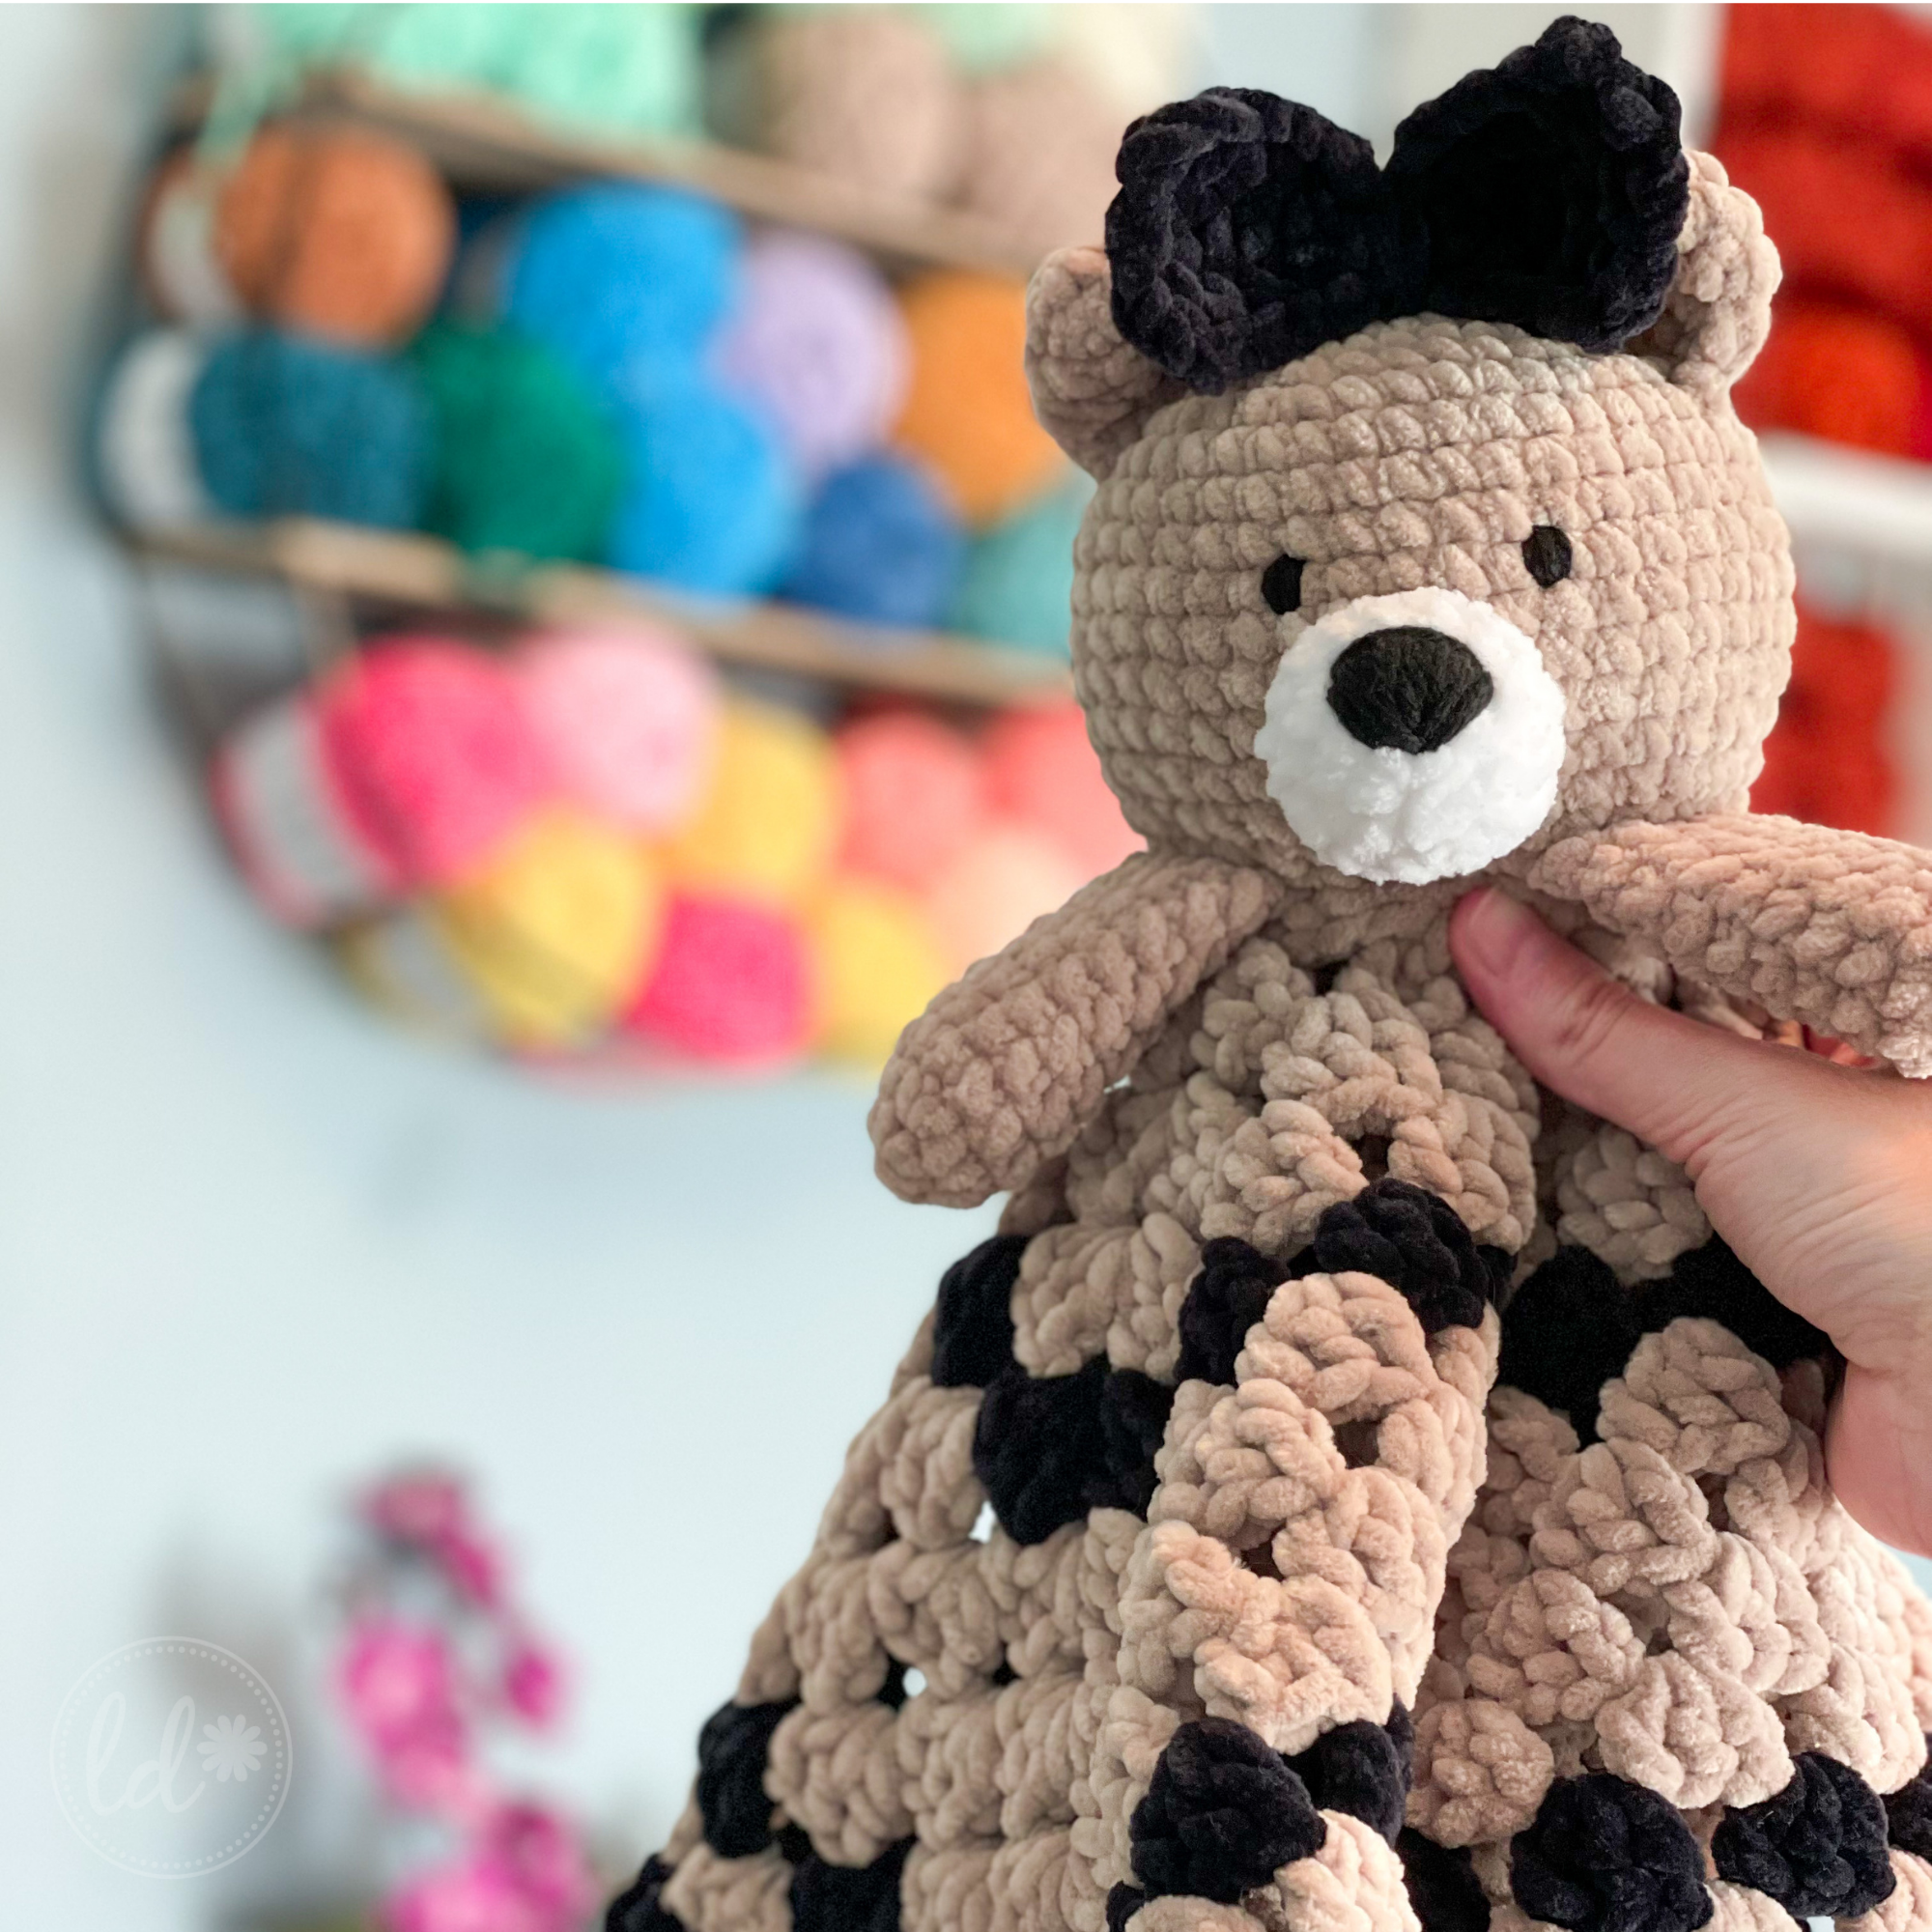

Elio Bear and Honey Cone - Free Crochet Pattern
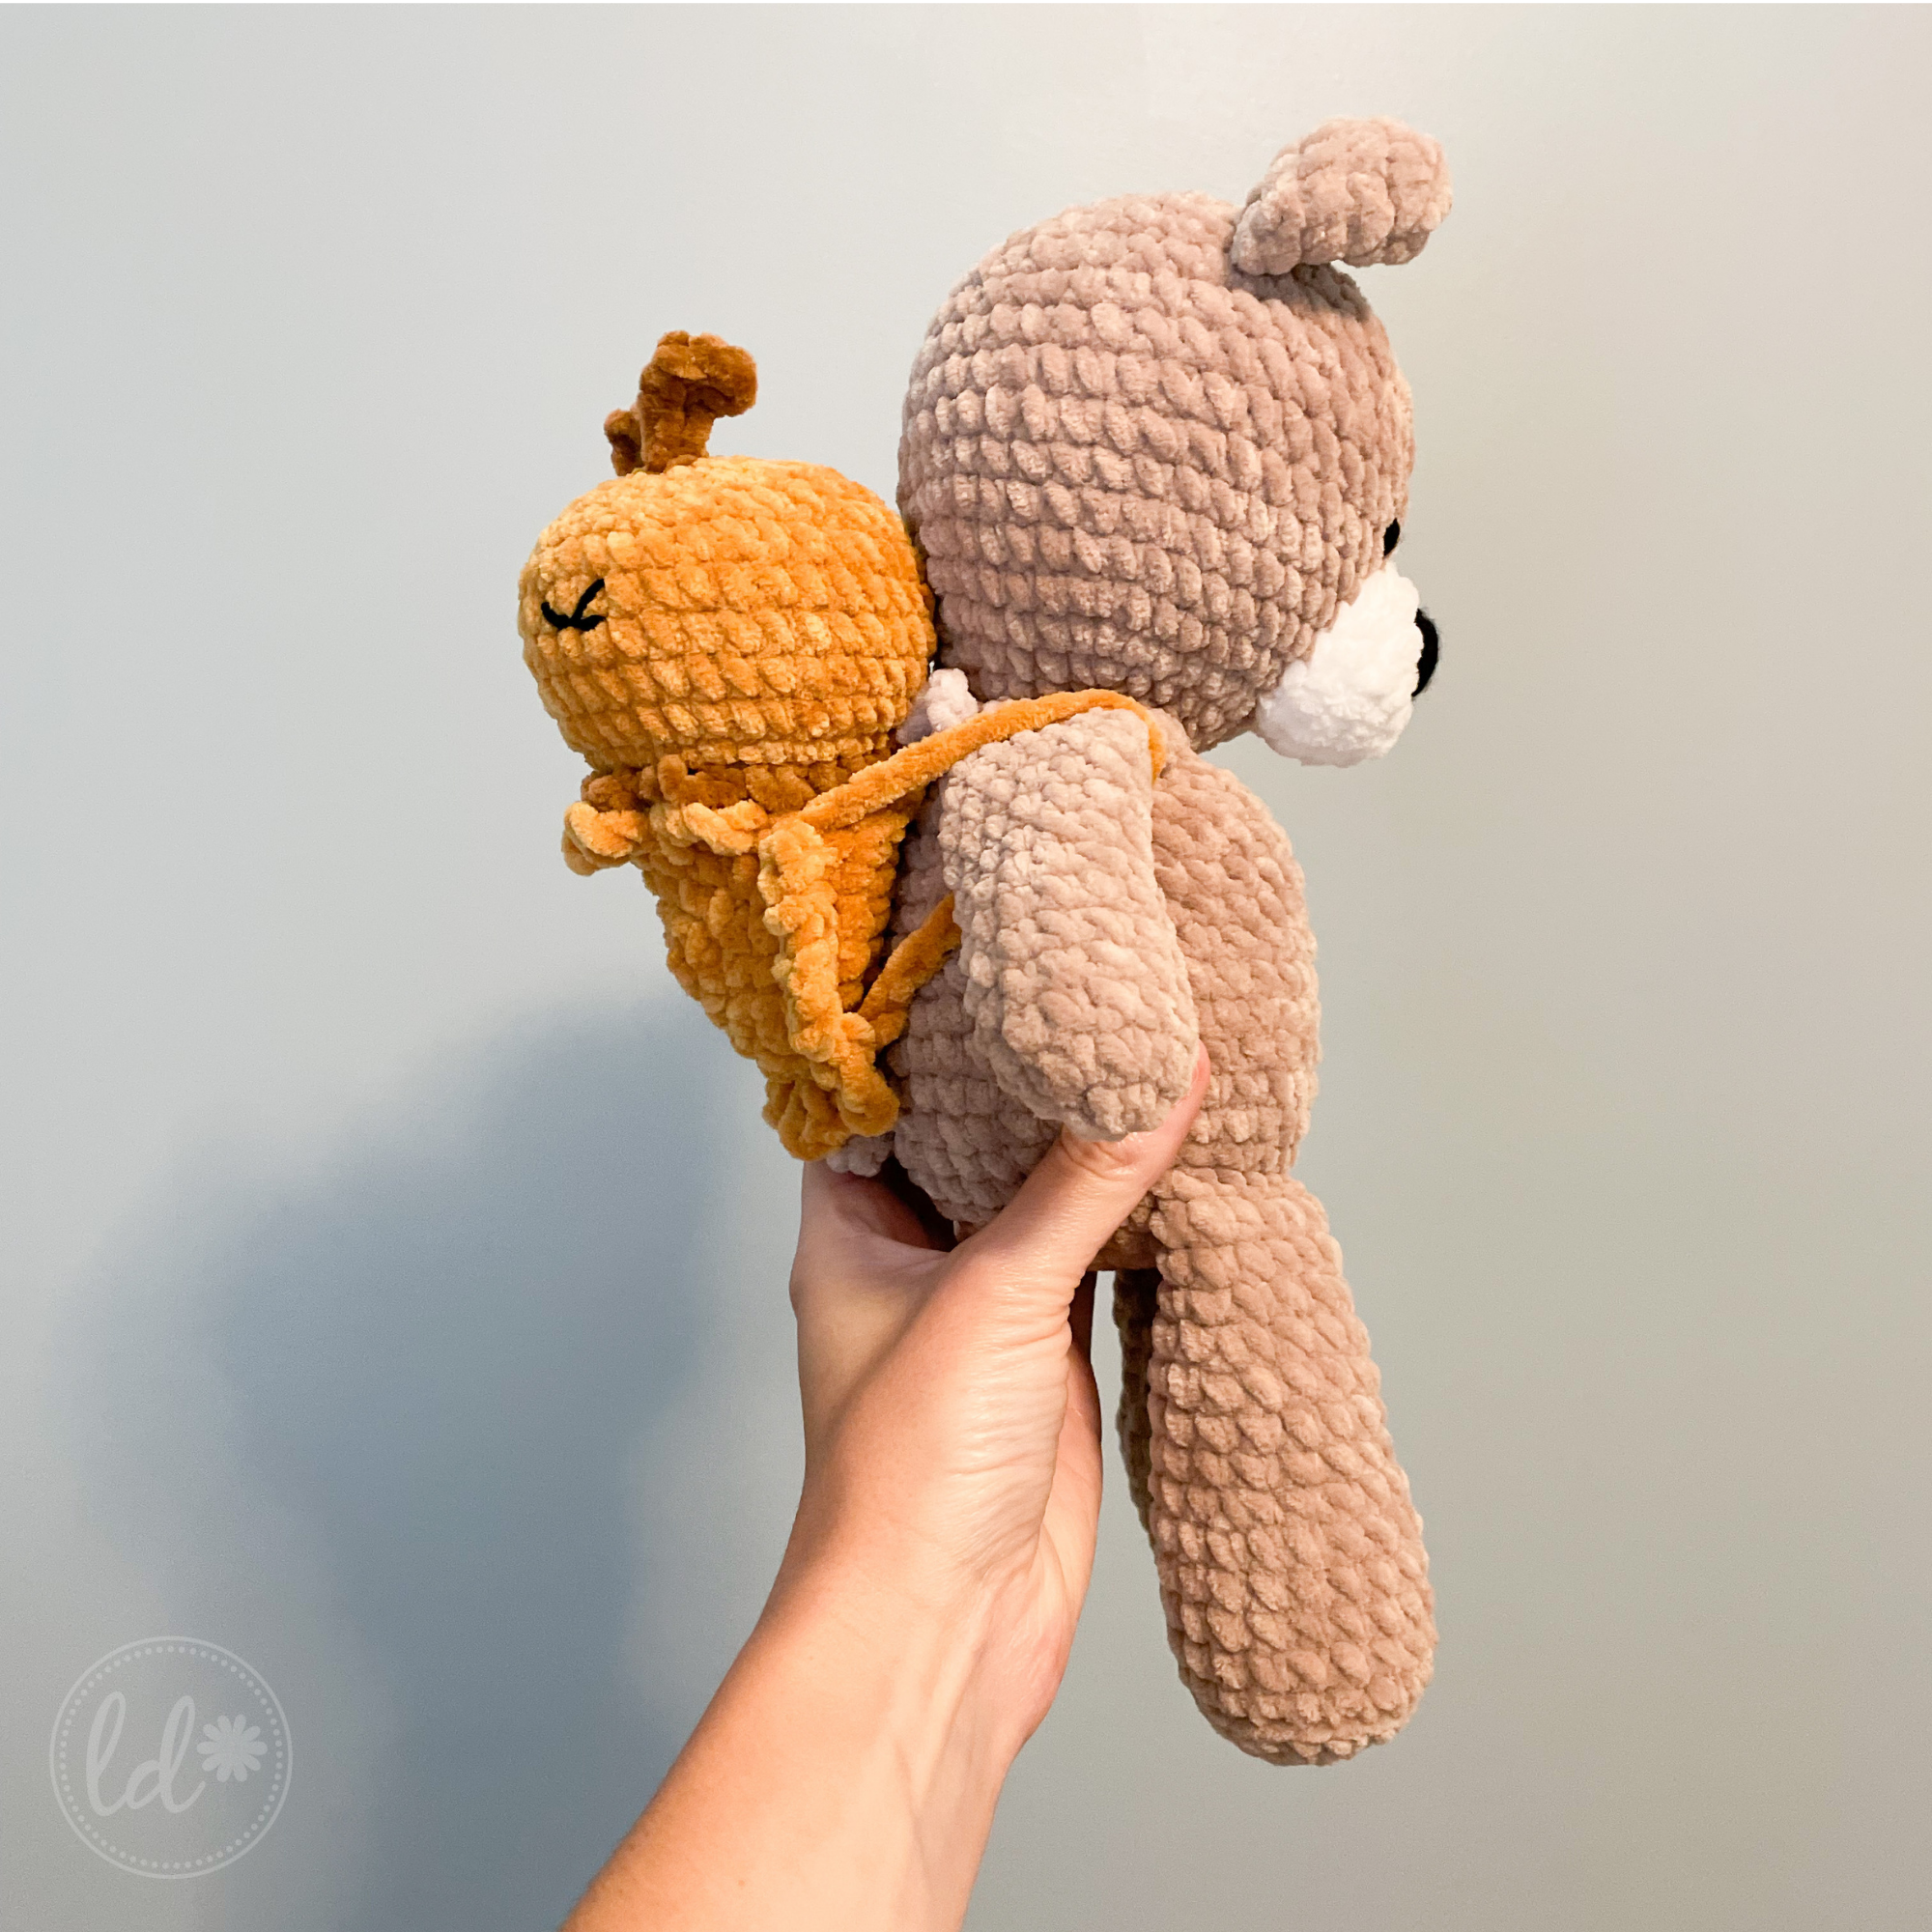
Happy Wednesday! I have a fun interactive pattern to share with you today, Elio Bear and Honey Cone! The sun bag is removable and so is honey “bee” cone. Elio and the honey cone bee are the best of friends.
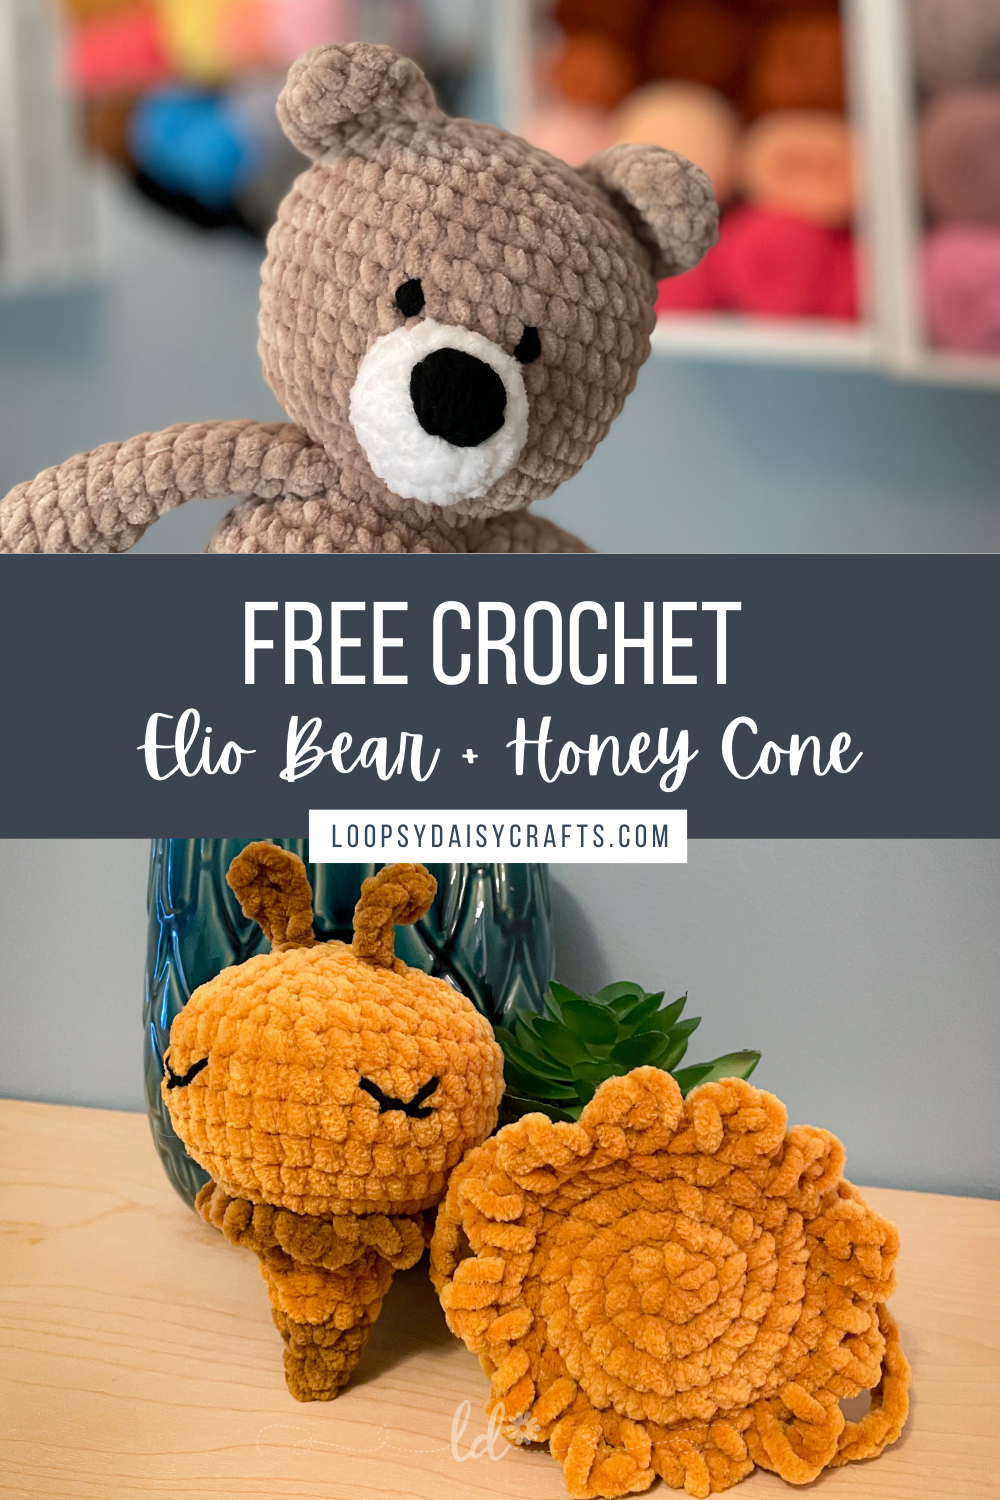
Not ready to start this project? Pin for later!
***You can purchase an INEXPENSIVE PDF of this pattern on Etsy or Ravelry! There are two versions available with the pdf download, color with pictures as well as an easy-to-print option in black and white without pictures.
Some of the links in this post may be affiliate links, meaning I may receive a small commission, at NO ADDITIONAL cost to you, from purchases made using the links provided. Please click here for more information.

This pattern is written to use plush/blanket and fur yarn. If you are new to working with plush yarn, click here to learn some helpful tips.
Materials:
• 4mm Crochet Hook for body and bee
• 7mm Crochet Hook for sun bag
• Parfait Chunky Yarn
• Stitch Markers (5)
• Tapestry Needle
• Polyfil Stuffing
• Scissors
• Black Thread or Worsted Weight yarn for eyes and nose
Abbreviations:
Rnd(s) - Round(s)
MC - Magic Circle
Dec - Invisible Decrease
Inc - Increase (2 sc in same st)
SC - Single Crochet
Sl St - Slip Stitch
F/O - Fasten Off
St(s) - Stitch(es)
HDC - Half Double Crochet
DC - Double Crochet
Sp(s) - Space(s)
Sk - Skip
YO - Yarn Over
FLO - Front Loop Only
BLO - Back Loop Only
Ch(s) - Chain(s)
Yarn:
Premier Parfait Chunky
100% Polyester Light Weight Super Bulky #6 Plush Yarn
• Toffee - Main Color - 2 skeins (Color A)
• White - Snout (Color B)
• Mustard - Sun Bag and Bee (Color C)
• Teddy Bear - Bee Accent (Color D)
• Mushroom - Bee Wings (Color E)
You may use any weight of yarn, just make sure to use corresponding hook. Gauge is not important for this project. The final product will vary depending on the yarn, hook and tension.
Approximate Size:
12.5" tall x 6" wide when standing 8" tall when sitting
Comparable Yarn Substitutions:
Hobbii Yarn Honey Bunny
(4mm hook for bear and bee & 7mm hook for bag)
Other yarns I love:
• Lion Brand Nap Time (3.5mm hook for bear and bee & 6mm or 6.5 mm for the bag)
• Loops & Threads Sweet Snuggles Lite (7mm hook for bear and bee, 9mm or 10mm for bag)

Notes:
This is an advanced beginner pattern, some amigurumi experience would be helpful. However, reach out with any questions or concerns. Please read through the entire pattern before beginning. This pattern is written in US terminology. It is made in continuous rounds. Do not ch1 or sl st at the end of each round unless instructed to do so. Place a stitch marker in the first stitch of each round. Stitch count is in ( ) at the end of each round. Make sure your count is correct before moving to the next round. The legs, arms and tail are attached as you crochet the body & head.
This pattern is for personal use only. Please do not copy, share, translate or reproduce this pattern. You are welcome to sell finished items from this pattern, but please give me credit (Krissy of Loopsy Daisy Crafts + Designs). I would love to see your finished pieces. Please tag me with @loopsydaisycrafts and use #loopsydaisycrafts on social media. For any questions or concerns regarding the pattern, please email hello@loopsydaisycrafts.com
Let’s Get Started!
Ears {make 2}
With 4mm hook and Color A
Rnd 1: sc 6 in mc (6 sts)
Rnd 2: inc x 6 (12 sts)
Rnd 3-4: sc in each st (12 sts) ••2 rnds ••
Do not stuff. Fold in half and sc the opening closed. F/O. Leave a long tail for sewing.
Arms {make 2}
With 4mm hook and Color A
Rnd 1: sc 6 in mc (6 sts)
Rnd 2: inc x 6 (12 sts)
Rnd 3-14: sc in each st (12 sts) ••12 rnds••
Lightly stuff the bottom only and F/O. I like to leave the arms open, but you can pinch the opening & add 6 sc across to close if you prefer. Arms will be joined as you crochet the body. Leave a few inches for the tail.
Legs {make 2}
With 4mm hook and Color A
Rnd 1: sc 6 in mc (6)
Rnd 2: inc x 6 (12 sts)
Rnd 3: [sc, inc] x 6 (18 sts)
Rnd 4: BLO sc in each st (18 sts)
Rnd 5-8: sc in each st (18 sts) •• 4 rnds ••
Rnd 9: [4 sc, dec] x 3 (15 sts) Rnd 10-12: sc in each st (15 sts) •• 3 rnds ••
Rnd 13: [3 sc, dec] x 3 (12 sts) Rnd 14-16: sc in each st (12 sts) •• 3 rnds ••
F/O and lightly stuff the bottom. I like to leave the top open for the legs, but you can add 6 sc across to close if you prefer. Legs will be joined as you crochet the body. Leave a few inches for the tail.
Snout
With 4mm hook and Color B
Rnd 1: sc 6 in mc (6 sts)
Rnd 2: inc x 6 (12 sts)
Rnd 3: [sc, inc] x 6 (18 sts) Rnd 4: sc in each st (18 sts)
F/O and leave a long tail
for sewing. Embroider the nose 5 sts across and 2 sts down. The bottom of the nose is 1 st up from the mc.

Body and Head
With 4mm hook and Color A. Starting with the body and working up to the head. The legs, tail, and arms will be attached as you go.
Rnd 1: sc 6 in mc (6 sts)
Rnd 2: inc x 6 (12 sts)
Rnd 3: [sc, inc] x 6 (18 sts)
Rnd 4: [2 sc, inc] x 6 (24 sts)
Rnd 5: [3 sc, inc] x 6 (30 sts)
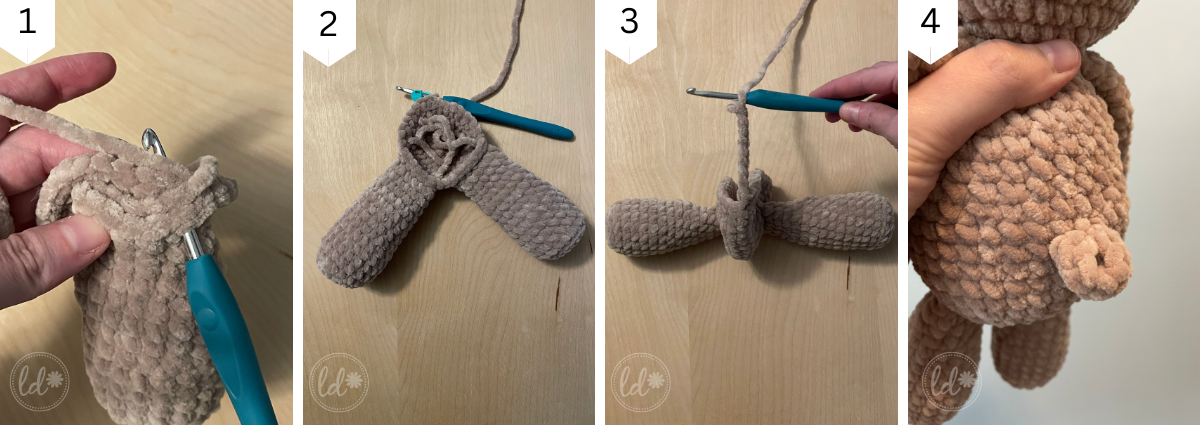
**The legs will be attached in the next rnd. The legs should hang down in front of the body with the working round at the top. Tie the yarn ends from the legs together loosely.
Rnd 6: 8 sc, attach the first leg with 6 sc through the leg and body, 2 sc, attach the second leg with 6 sc through the leg and body, 8 sc (30 sts) (pictures 1 & 2)
Rnd 7: [4 sc, inc] x 6 (36 sts)
**Fold the body in half to find the center of the body for the tail. The tail will be created in the FLO first st of the rnd. Move your stitch marker if needed. I place mine in the BLO of this stitch. The remaining sts will be worked through both loops as normal. (picture 3)
Rnd 8: FLO sl st, ch 10, FLO sl st back into the original sc to create a loop; 35 sc (36 sts)
Rnd 9: work 1 sc in the BLO from rnd 8 for the 1st st only, 35 sc (36 sts for the 1st st only, 35 sc (36 sts) (picture 4)
Rnd 10-12: sc in each st (36 sts) •• 3 rnds ••
Rnd 13: [4 sc, dec] x 6 (30 sts)
Rnd 14-17: sc in each st (30 sts) •• 4 rnds ••
Rnd 18: [3 sc, dec] x 6 (24 sts)
Rnd 19: [2 sc, dec] x 6 (18 sts)
**The arms will be attached in the next rnd. Make sure the arms are even on each side of the body. Pin the arms with safety pins or stitch markers to hold the arms in place. (picture 5) You may have to move your main stitch marker (for the rnd) over a few spaces. Tie the yarn ends from the arms together loosely. (picture 6) Hide ends on the inside.
Rnd 20: 3 sc, attach the first arm with 6 sc through the arm and body, 3 sc, attach the second arm with 6 sc through the arm and body (18 sts)
**Stuff the body. Starting the head next.
Rnd 21: [2 sc, inc] x 6 (24 sts)
Rnd 22: [3 sc, inc] x 6 (30 sts)
Rnd 23: [4 sc, inc] x 6 (36 sts)
Rnd 24: [5 sc, inc] x 6 (42 sts)
Rnd 25-32: sc in each st (42 sts) •• 8 rnds ••
Rnd 33: [5 sc, dec] x 6 (36 sts)
Rnd 34: [4 sc, dec] x 6 (30 sts)
**Begin stuffing the head. If you are using safety eyes, insert them between rnds 29-30. If you are using blanket yarn, you may want to place them between rnds 30-31. Placement will vary based on different yarn weights and size of safety eyes.
Rnd 35: [3 sc, dec] x 6 (24 sts)
Rnd 36: [2 sc, dec] x 6 (18 sts)
Rnd 37: [1 sc, dec] x 6 (12 sts)
Rnd 38: dec x 6 (6 sts)
Stuff. Sl st into the next st to F/O. Weave tail through the FLO of the remaining 6 stitches, pull to close. (pictures 7 & 8)

Assembly
• Pin the snout in place. The bottom of the snout should be on rnd 22 with the top on rnd 28. Stuff the snout and sew onto the bear.
• Pin the ears. The top of the ears should be on rnd 36. The bottom of the ears should be on rnd 32. Approximately 4 to 5 sts between the ears at the top.
• Embroider the eyes with black thread or black yarn over rnd 29 with about 4 sts between.

continue to sun bag
Sun Bag
With 7mm hook and Color C. The bag will have lots of loose ends to weave in. It will be open so you can add notes or Elio can carry little toys around, like Honey Cone.
Back Piece
Rnd 1: sc 6 in mc (6 sts)
Rnd 2: inc x 6 (12 sts)
Rnd 3: [sc, inc] x 6 (18 sts)
Rnd 4: [2 sc, inc] x 6 (24 sts) F/O and weave in ends.
Front Piece
Rnd 1: sc 6 in mc (6 sts)
Rnd 2: inc x 6 (12 sts)
Rnd 3: [sc, inc] x 6 (18 sts)
Rnd 4: [2 sc, inc] x 6 (24 sts)
Do not F/O. Weave in beginning tail from mc. Continue to the sun rays. (picture 9)
Hold the front piece and back piece with the inside facing each other (picture 10). Sc 16 around both pieces together. Turn, ch 3, sl st in the next st *(sl st in next st and ch 3, sl st in next st) rep 6 more times. Working in the back piece only, *(sl st in next st and ch 3, sl st in next st) x 4. There should be 12 "rays."
Do not F/O. (picture 12)
Continue to the straps next.

Creating the straps:
Ch 15 and sl st into a st on the bottom of rnd 4 of the bag on the back piece (picture 13). Make sure the strap fits on the bears back over the arms like a backpack. Adjust number of chains if needed. Cut yarn with approximately a 30" tail. This tail will be used for the 2nd strap. Weave the yarn through the bag to continue the strap on the other side with about 5 sts between (picture 14). Using the tail, ch 15 and sl st into the last st of the opening of the bag. Take care that both straps are the same size. Weave in tail. (picture 15 & 16)
OPTIONAL:
If you would rather have a crossbody bag, ch enough sts to go across the body (approximately 25) and sl st in the other side of the open section of the bag to create a strap. (pictures 17 & 18)

Honey "Bee" Cone - No Sew
With a 4mm hook start with Color D. Starting at the bottom and working up to the head. The bee is no sew, meaning everything will be attached as you go. When changing colors, drop color and pickup new color. I don't carry the yarn. Stuff as you go.
Rnd 1: sc 4 in mc (4 sts)
Rnd 2: sc in each st (4 sts)
Rnd 3: [sc, inc] x 2 (6 sts)
Rnd 4: [2 sc, inc] x 2 (8 sts)
**Chg to Color C
Rnd 5: [3 sc, inc] x 2 (10 sts)
Rnd 6: [4 sc, inc] x 2 (12 sts)
**Chg to Color D
Rnd 7: [5 sc, inc] x 2 (14 sts)
**Chg to Color C
Rnd 8: [6 sc, inc] x 2 (16 sts)
Rnd 9: [7 sc, inc] x 2 (18 sts)
Rnd 10: Sc 1 in the BLO of the next st. Place a st marker in this st and remove hook. Pull up loop in the FLO of this st in Color D (picture 19). Continue working in the FLO for this rnd. Diagram is below.
FLO Rnd: *(Ch 3, sl st in next st, sl st in next st) repeat 7 more times for a total of 8 small loops. Chg to Color E to create the wings.
Wing 1: Wing 1 is created with 2 loops in the same st.
Ch 8, sl st in same st, ch 6, sl st in same st, sl st in next st.
Wing 2: Wing 2 is also created with 2 loops in the same st.
Ch 6, sl st back into same st, ch 8, sl st back into same st (picture 20).
Chg to Color D. Join with a sl st back into the FLO of the first st of rnd 10 and F/O. Hide inside and tie ends together after BLO rnd is complete.
BLO Rnd: Pick up Color C from BLO (picture 21). Sc inc in BLO of each st. (36 Color C sts)


Rnd 11-15: sc in each st (36 sts) •• 5 rnds ••
Rnd 16: [4 sc, dec] x 6 (30 sts)
**If you are using safety eyes, place them between rnds 13 & 14, begin stuffing.
Rnd 17: [3 sc, dec] x 6 (24 sts)
Rnd 18: [2 sc, dec] x 6 (18 sts) (picture 22)
**The antennae will be made in the next rnd. Do not cut yarn when changing colors. Drop yarn and pick it back up loosely for second antennae. Take care that the antennae are centered. Adjust st marker if needed.
Rnd 19: sc, dec, sc, dec. Chg to Color D, ch 5, sc 4 in the first ch from hook, sl st in each ch, chg to Color C in the same st. Dec, sc, dec, chg to Color D, ch 5, sc 4 in the first ch from hook, sl st in each ch, chg to Color C in the same st. Dec, sc, dec. (12 sts - not including antennae chs) (pictures 23-25)
**Cut Color D yarn and tie ends together loosely. Hide tails inside. Stuff.
Rnd 20: dec x 6 (6 sts)
Stuff and F/O. Add eyes over rnd 14 with about 6 sts between. (pictures 26-31)

Elio Bear & Honey Cone is Finished!
Thank you for your support! I hope you enjoyed making Elio Bear and Honey Cone. I would love to see your makes. Tag me on social media @loopsydaisycrafts and use #loopsydaisycrafts.
If you enjoyed this pattern, be sure to subscribe to my newsletter to stay updated on new pattern releases, exclusive discounts, and freebies! If you have any questions or concerns regarding the pattern, please email hello@loopsydaisycrafts.com or comment below.